How-To
Step-by-Step Instructions for Making a Custom AI Assistant Using OpenAI GPT
A data scientist explains the 15-step, no-coding-required workflow to create your own mini-ChatGPT. All you need is a Microsoft or Google Gmail account and a $20-per-month "Plus" subscription from OpenAI, which can be canceled at any time.
- By Pure AI Editors
- 01/25/2024
Until very recently, creating a custom AI assistant that has unique knowledge was an extremely difficult task that required software developers with expert coding skills. A few weeks ago, OpenAI released an easy-to-use web tool to create a custom AI assistant, with no coding required. See "Introducing GPTs."
This post walks through the creation of a custom "chess history" assistant. There are two prerequisites. You must have a Google (Gmail) account or Microsoft account. I recommend Google because it has worked better for me. And you will need to subscribe to an OpenAI "Plus" account using a credit card for $20 per month. But you can cancel the subscription at any time.
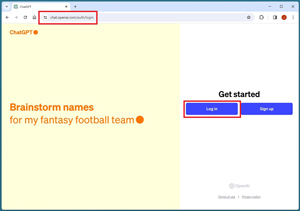
Step 1. Open a Web browser (Chrome or Edge) and navigate to https://chat.openai.com. Click on the "Log In" button.
 [Click on image for larger view.]
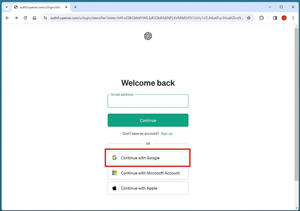
Step 2. Click on the "Continue with Google" button.
 [Click on image for larger view.]
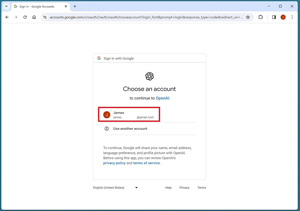
Step 3. Assuming you already have a Google account, your email address will already be filled in. Click on it. If you don't have an OpenAI "Plus" account, the next Web page will give you the option to subscribe to it for $20 per month. Select that option, and fill in your information.
 [Click on image for larger view.]
 [Click on image for larger view.]
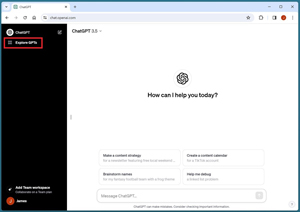
Step 4. There is an "Explore GPTs" button in the left margin. Click on it.
 [Click on image for larger view.]
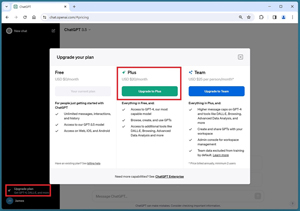
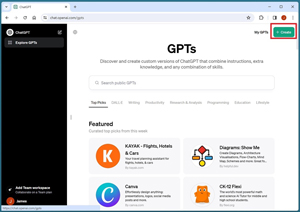
Step 5. If you have a "Plus" account, you will see a "Create" button in the upper right. Click it. If you don't see the Create button, it means you're not signed in with a "Plus" account.
 [Click on image for larger view.]
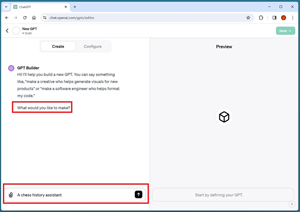
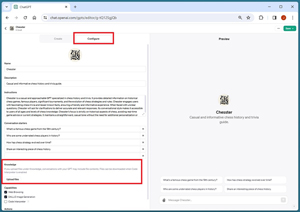
Step 6. You will be asked what kind of GPT assistant you want to make. Give a broad, general answer -- you will refine the topic shortly. Notice that there are two tabs: "Create" and "Configure." You should be in "Create."
 [Click on image for larger view.]
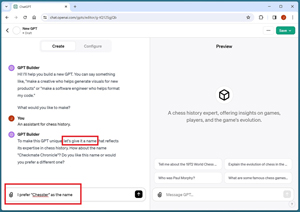
Step 7. You will be given a proposed name for your GPT assistant. You can accept the proposed name or try another. The GPT assistant name must be unique, so don't use "Chesster" as shown in the image.
 [Click on image for larger view.]
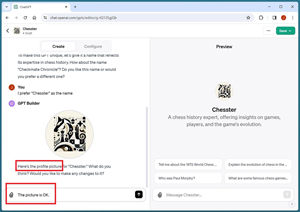
Step 8. You will be given a proposed picture for your GPT assistant. Accept it or ask for another option.
 [Click on image for larger view.]
Step 9. You will be asked to refine the topic of your GPT assistant. Provide more granular information.
 [Click on image for larger view.]
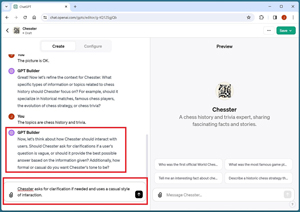
Step 10. You will be asked about your assistant's tone and interaction style. I recommend a casual tone, but allow your assistant to ask for clarification if necessary.
 [Click on image for larger view.]
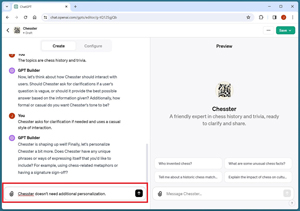
Step 11. You will be asked if you want any additional personalizations. If you don't provide any at this time, you can always add them later.
 [Click on image for larger view.]
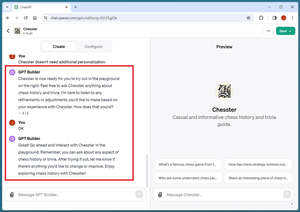
Step 12. Your GPT assistant is now ready to use. However, it only knows general ChatGPT information. To enhance your custom GPT assistant, you need to upload documents that contain specific knowledge, unique to your assistant.
 [Click on image for larger view.]
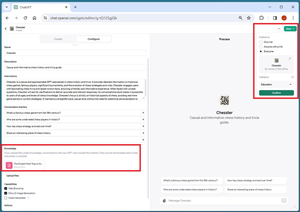
Step 13. Click on the "Configure" tab. Look for the "Knowledge" section. Click on the "Upload files" button.
 [Click on image for larger view.]
Step 14. Navigate to one of your documents. For testing purposes, you can create a very short Word or PDF or text file that defines or explains a non-existent term such as "A Flooble is a slang term for a newly hired employee." In the demo shown, a document that describes a non-existent chess "Knight Hole" trap was uploaded. In a non-demo scenario, you can upload company handbook information, how-to documents and so on.
After your document has been uploaded, click on the Save button in the upper right. The default option is to make your GPT assistant visible to everyone. In a non-demo scenario, you will often want to restrict access using the "Anyone with a link option."
 [Click on image for larger view.]
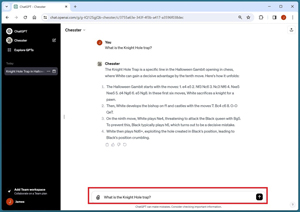
Step 15. Your custom GPT assistant is ready to use. Ask it some general questions related to your topic, and ask question(s) that can only be answered using the custom knowledge document, such as, "What is a Flooble?"
 [Click on image for larger view.]
You can go to the Configure tab and tidy up your assistant by modifying the default prompt questions, add more knowledge documents, edit the description and so on.